
Starting your smart home transformation can be a daunting task. Even though you might have a clear goal in mind, the path to achieving it, and especially the first steps, often remain too hazy for comfort. To provide clarity, the following guide to DIY smart home lists the initial steps that might help you understand what lies ahead if you decide to embark on this journey and create your first device.
Even if you are thinking big, it’s perfectly fine to start small. You can kick off your smart home with a single device only handling one simple task. Furthermore, there are plenty of free online services available, making the trial-and-error approach highly viable. These options alleviate the need to start with any significant upfront investment. Instead, you can scale the whole system organically as the number of your IoT devices grows, allowing for a smoother and more manageable progression.
Get the Hardware
The heart of any unicontrol device is an ESP8266 microcontroller, a tiny, programmable, low-cost microchip with Wi-Fi capability. There are many hardware variants, but any ESP8266 with at least 4MB of flash memory is compatible with unicontrol. This effectively narrows the choice down to the ESP-12E/F/S, or special boards like D1 mini pro. The good news, however, is that this includes the vast majority of ESP8266 boards or modules sold today. We recommend heading to any major online retailer like Amazon, eBay, or Aliexpress, searching for the WeMOS D1 mini (€2 – €4), and purchasing one.
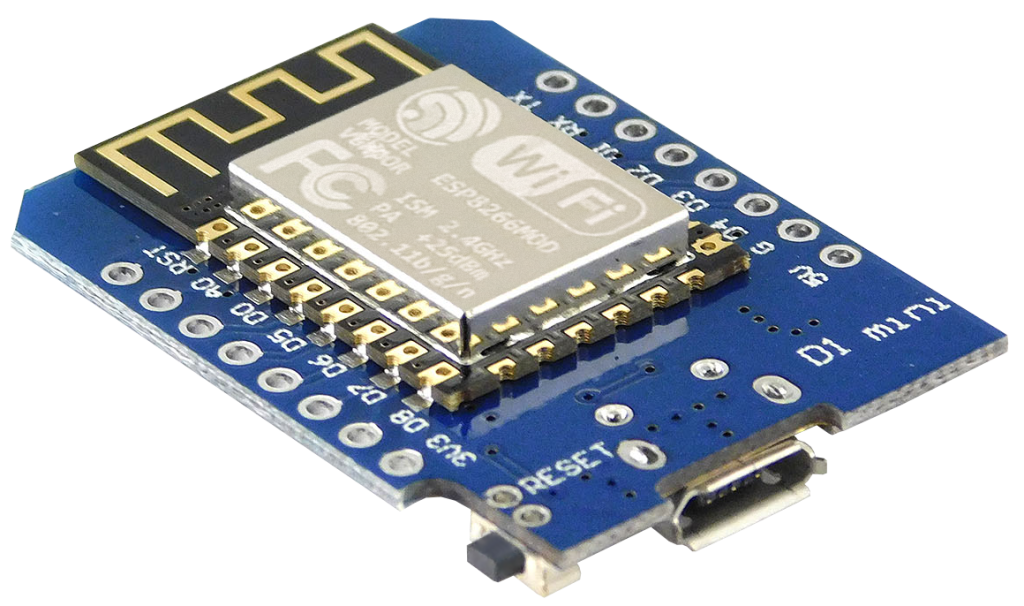
Be careful with the choice, though. The cheapest D1 minis often do not have an original CH340 chip. While this doesn’t affect the ESP8266 itself, it complicates the board flashing process, necessitating an external TTL-to-USB converter. For guidance on how to proceed in that scenario, check this post.
Once your microcontroller is in the cart, you’ll also need some additional hardware:
- Power supply: The most basic option is a 5V/1A power adapter. Often, a standard USB charger suffices, whether you connect it via the on-board micro-USB connector or directly to the
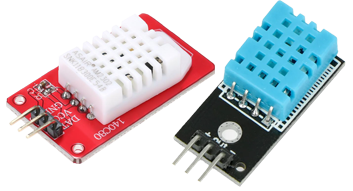
5VandGNDpins. - Sensors: Depending on your project, you’ll want to collect some sensor readings. For starters, you might consider a thermometer like the DHT11 (~€1), DHT22 (~€2), or DS18B20 (€0.5 – €5). However, nearly any Arduino sensor will work.
- Relay: If your goal is to control something, you should also get a relay. A
WeMOS D1 mini Relay Module(€1 – €2) serves as a good starting point. - Cables: Typically, you’ll need to connect all the hardware together, and any jumper or scrap cables will usually suffice.
While it may be obvious for a DIY electronics, you will need at least a basic soldering equipment.
Flash and access your ESP8266
Once you have your ESP8266, you need to upload a program onto it; it won’t do anything on its own. A traditional approach involves coding your own software in Arduino IDE or Python. However, most of the basic smart home applications can be managed by unicontrol with no coding at all. To see how, you can check the video or the step-by-step guide provided below.
- Connect your ESP8266 to your computer using a USB cable.
- Navigate to the download page for the esp web tool.
-

 Click on
 Factory Installin the mini row. -
A pop-up menu will appear. If it lists the COM port with your ESP8266, select it and proceed with the installation.
-
Once the installation is complete, the esp web tool will prompt you to enter your Wi-Fi credentials (note that only the 2.4GHz networks are compatible ESP8266).
-
Once a successful connection is established, you’ll be given the option to Visit Device. Click on it and save the IP address that is displayed on the device’s page.
- Returning to the download page, click
Downloadin the interface row. - Unpack the archive to any folder on your computer and open the index.htm page, which launches the unicontrol interface.
- Paste the previously copied IP address into the Connect field in the upper-right corner of the interface and click
Connect. - You now have full control over your ESP8266 and can configure it to your specific needs.
The steps 3 – 6 are only applicable to Chrome or Edge browser. To flash your ESP8266 without any of these browsers, please, follow our manual flashing tutorial.
Assemble and set up your device
Lastly, after gaining full access over your ESP8266 you need to give it a purpose based on your needs. There is a number of available tutorials covering both hardware assembly and software set-up. These guides cater to various levels of technical expertise and project complexities. By following them, you can personalize your smart device setup to meet your unique needs and preferences, effectively bringing your initial vision to life. Feel free to pick any of them to continue:
- Youtube video-tutorials:
- Local tutorials:
- ESP-12F Relay modules:
Alleviate your DIY smart home
Congratulations, your first device is now up and running. To guide you further into achieving your true smart home, we are preparing more articles of the beginner series to guide you through the process. You can look forward to discussing:
- Cybersecurity of your IoT network
- Free online IoT services, their strengths and weaknesses
- Setting up own smart home server
- Popular MQTT mobile apps