Manual flashing of the ESP8266 may be necessary if, for any reason, the standard web installer upload is inaccessible. We recommend uploading the software image in .bin format to your ESP8266 using the NodeMCU Firmware Programmer. This tool has an intuitive interface, works reliably, and is easy to use, even for beginners.

Download the .bin

First, navigate to the download page and Download any of the latest software builds. Unpack the downloaded archive, which includes the .bin file.
The included .bin file is equivalent to the Upgrade version available via the web installer. It’s perfectly fine to flash this file to your ESP8266. However, in contrast to flashing the Factory Install version via the web installer, be ready for a prolonged first launch due to the device’s preparation for the initial boot.
Always verify that you are downloading the files from the original and secure ayatec.eu domain.![]()
Select the .bin
In the Config menu of the Firmware Programmer, provide the desired *.bin file by clicking on the gearwheel icon and selecting the file from your computer. The file name will be displayed in the designated line. Ensure that the checkbox at the beginning of the line is marked.
The address on the right-hand side of the line should remain at its default, 0x00000. This will ensure that the tool will write the program from the beginning of the module’s memory space. The other lines should stay blank, as unicontrol always comes in a single file.

Upload settings
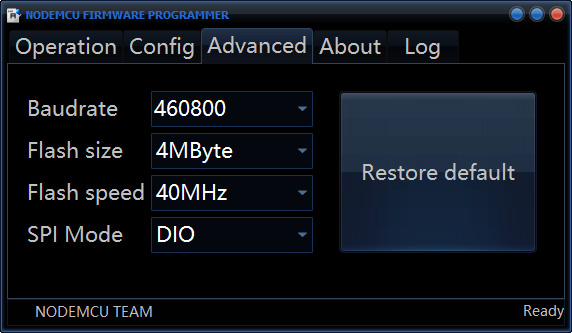
Next, in the Advanced menu, please use the following settings:
- Baudrate: 460 800
- Flash size: 4MB
- Flash speed: 40MHz
- SPI Mode: DIO
Flashing
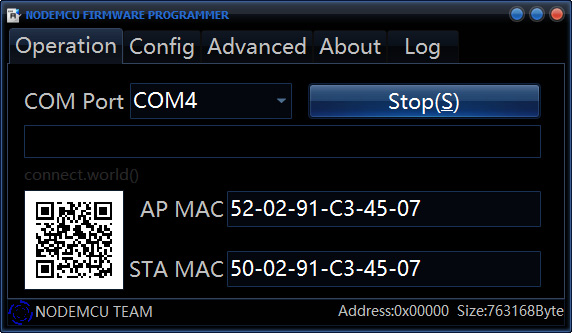
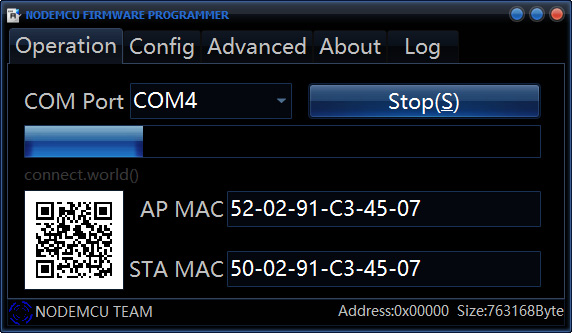
You can now proceed with the program upload. Navigate to the Operation menu. If the ESP8266 module is connected with a USB cable, the relevant COM port will be pre-selected automatically. If this is not the case, you’ll need to manually select the correct COM port for your ESP8266. To initiate the upload procedure, press the Flash(F) button.
We do not recommend connecting more than one ESP8266 to a computer at the same time, as this can easily lead to confusion and loss of work.
Prior to the upload itself, the program identifies the module and displays its MAC addresses in the appropriate fields, along with a QR code. This indicates a successful handshake and a following upload.
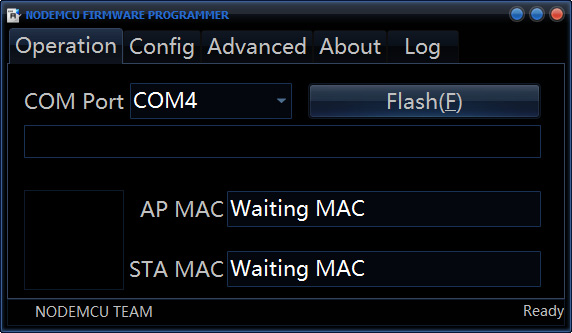
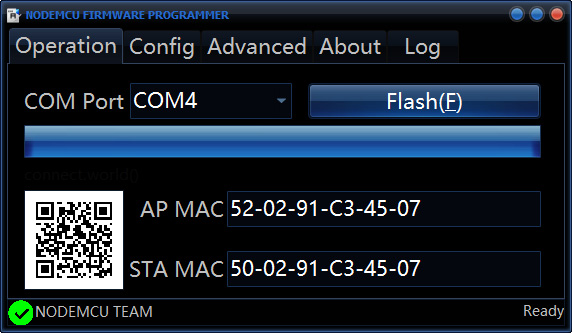
Once the entire progress bar fills, the program upload is complete, and the Flash(F) button becomes available again. At this point, you can disconnect or reset the device to allow the program to start upon the next boot.
This procedure does not automatically reset the module following a successful program upload. For the program to boot, the user must manually reset or reconnect the ESP8266.
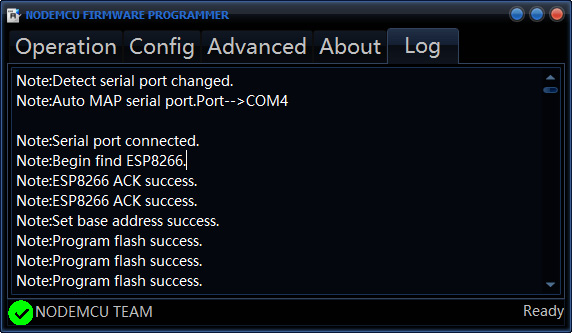
You can verify the program upload in the Log menu, where the upload states are listed following the upload.